As a music producer or engineer, crafting a professional vocal chain is essential for achieving polished, radio-ready vocal tracks. A well-designed vocal chain can help you shape the tone, dynamics, and spatial characteristics of your vocals, while also addressing any technical issues or creative goals. In this article, we’ll explore the key components of a professional vocal chain and provide step-by-step guidance on how to build your own.

Understanding the Components of a Vocal Chain
A typical vocal chain consists of several processors arranged in a specific order, each serving a unique purpose. The main components of a professional vocal chain include:
- Pitch Correction: Pitch correction plugins like Antares Auto-Tune Pro or Waves Tune are used to correct intonation issues and add creative effects.
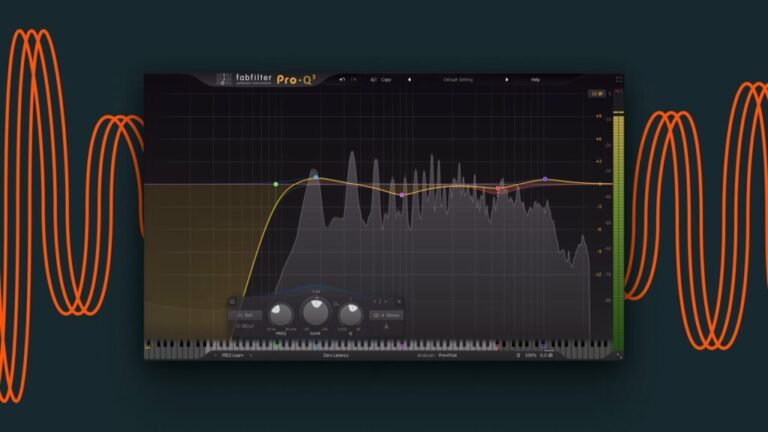
- Equalization (EQ): EQ plugins, such as FabFilter Pro-Q 3 or Waves Renaissance EQ, are used to shape the frequency balance of the vocals, removing unwanted frequencies and enhancing desirable ones.
- Compression: Compressors, like the UAD LA-2A or Waves CLA-76, are used to control the dynamic range of the vocals, adding consistency, punch, and presence.
- De-essing: De-esser plugins, such as the Softube Weiss DS1-MK3 or FabFilter Pro-DS, are used to tame sibilance and harsh high-frequency content.
- Saturation: Saturation plugins, like the Softube Harmonics or UAD Studer A800, can add warmth, character, and analog-style coloration to the vocals.
- Reverb and Delay: Spatial effects like reverb and delay, using plugins like FabFilter Pro-R or SoundToys EchoBoy, are used to add depth, dimension, and space to the vocals.
By understanding the role of each component in a vocal chain, you can make informed decisions when building your own chain and tailoring it to your specific needs.
How to Create a Vocal Chain Like Kanye West
Step-by-Step Guide to Building a Professional Vocal Chain
Now that you understand the components of a vocal chain, let’s walk through the process of building your own professional vocal chain.
Step 1: Start with Pitch Correction
Begin your vocal chain with a pitch correction plugin like Antares Auto-Tune Pro. Use this plugin to subtly correct any intonation issues and ensure that your vocals are in tune. If desired, you can also use pitch correction creatively for the iconic “Auto-Tune effect.”
Set Up Melodyne for the Best Pitch Correction
Step 2: Shape the Tone with EQ
Next, use an EQ plugin like FabFilter Pro-Q 3 to shape the frequency balance of your vocals. Start by using a high-pass filter to remove any low-end rumble or unwanted low frequencies. Then, use gentle boosts or cuts to enhance or tame specific frequency ranges, such as boosting the presence region (around 5 kHz) for clarity or cutting the low-mids (around 200-500 Hz) to reduce muddiness.

Step 3: Control Dynamics with Compression
After EQ, add a compressor to your vocal chain to control the dynamic range of your vocals. A classic choice is the UAD LA-2A or Waves CLA-76. Set the threshold so that the compressor engages when the vocals exceed a certain level, and adjust the ratio to taste (start with a gentle ratio of 2:1 to 4:1). Use a relatively fast attack time (1-10 ms) to catch transients and a medium release time (50-100 ms) to allow the compressor to recover between phrases.
How to Achieve Professional Vocal Sounds in Any DAW
Step 4: Tame Sibilance with a De-esser
If your vocals have excessive sibilance or harsh high-frequency content, use a de-esser plugin like the Softube Weiss DS1-MK3. Place the de-esser after the compressor in your vocal chain, and adjust the threshold and frequency settings to target and attenuate the problematic frequencies.
Step 5: Add Warmth and Character with Saturation
To add warmth, character, and analog-style coloration to your vocals, consider using a saturation plugin like the Softube Harmonics or UAD Studer A800. Use these plugins subtly to add harmonic richness and gentle distortion, which can help your vocals sound more cohesive and “glued” together.

Step 6: Create Space with Reverb and Delay
Finally, add depth and dimension to your vocals using spatial effects like reverb and delay. For reverb, try a plugin like FabFilter Pro-R, and choose a reverb type (plate, room, hall) that complements your vocal style and mix. For delay, consider using a plugin like SoundToys EchoBoy to create echoes, slap-back effects, or more complex delay patterns. Use these effects sparingly, and adjust the wet/dry balance to taste.
Step 7: Fine-tune and Automate
Once you have your basic vocal chain set up, take the time to fine-tune each processor’s settings to achieve the best possible sound. Don’t be afraid to make subtle adjustments to EQ, compression, and other settings to suit the specific needs of your vocal track.
Additionally, consider using automation to create dynamic changes in your vocal chain throughout the song. For example, you might automate the reverb level to increase during a bridge or chorus, or use volume automation to emphasize certain words or phrases.
Tips for Optimizing Your Vocal Chain
As you build and refine your vocal chain, keep these tips in mind:
- Use high-quality plugins: Invest in well-designed, transparent plugins that don’t introduce unwanted artifacts or coloration.
- Less is often more: Avoid over-processing your vocals, as this can lead to an unnatural or fatiguing sound. Use each processor intentionally and sparingly.
- Experiment with plugin order: While the order presented in this article is a good starting point, don’t be afraid to experiment with different plugin orders to achieve unique sounds or address specific issues.
- Use automation: Employ automation to create dynamic changes in your vocal chain, adding interest and emphasizing key moments in the performance.
- Trust your ears: Ultimately, the most important tool in building a professional vocal chain is your own listening skills. Trust your ears and make decisions based on what sounds best for your specific vocal track and mix.

Conclusion: How to Build a Professional Vocal Chain
Building a professional vocal chain is an essential skill for any music producer or engineer. By understanding the key components of a vocal chain and following the step-by-step guide outlined in this article, you can create polished, radio-ready vocal tracks that stand out in your mixes.
Remember, the key to a great vocal chain is balance, intentionality, and a focus on serving the song and the artist’s vision. With practice, experimentation, and a commitment to honing your craft, you’ll be able to build vocal chains that showcase the best in your vocal performances and productions.
Happy mixing!
