How to Sample in FL Studio 21: Sampling is a fundamental technique in modern music production, and FL Studio 21 offers powerful tools to make the process smooth and creative. In this comprehensive guide, we’ll cover everything you need to know about sampling in FL Studio 21, from the basics to advanced techniques.
Choosing the Right Sample
Before diving into the technical aspects, it’s crucial to start with the right sample:
- Avoid samples that are mainly drums, as they limit your creative options.
- Look for samples with melodic content or interesting textures.
- Consider using sample packs or paid sites for high-quality, pre-cleared samples.

Step 1: Aligning Your Sample with the BPM
Getting your sample in sync with your project’s tempo is the first crucial step:
- If your sample’s BPM is known:
- Set your project BPM to match the sample before importing.
- Drag the sample into FL Studio.
- Use the metronome to check alignment.
- For unknown BPM:
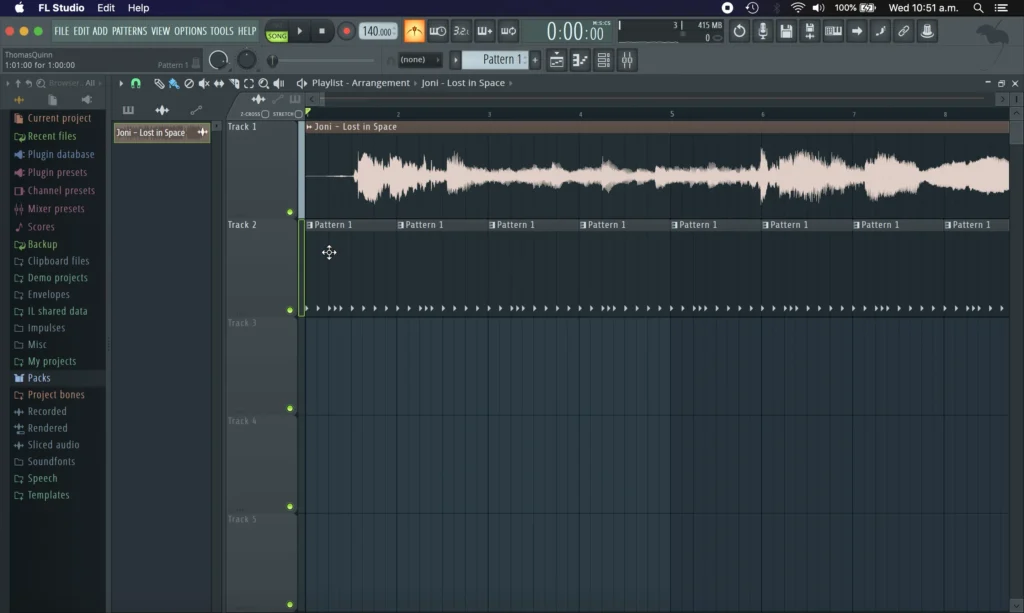
- Right-click the sample and select “Detect Tempo” (set range to 75-150 BPM).
- If needed, manually stretch the sample to fit the grid.
- For samples with inconsistent timing:
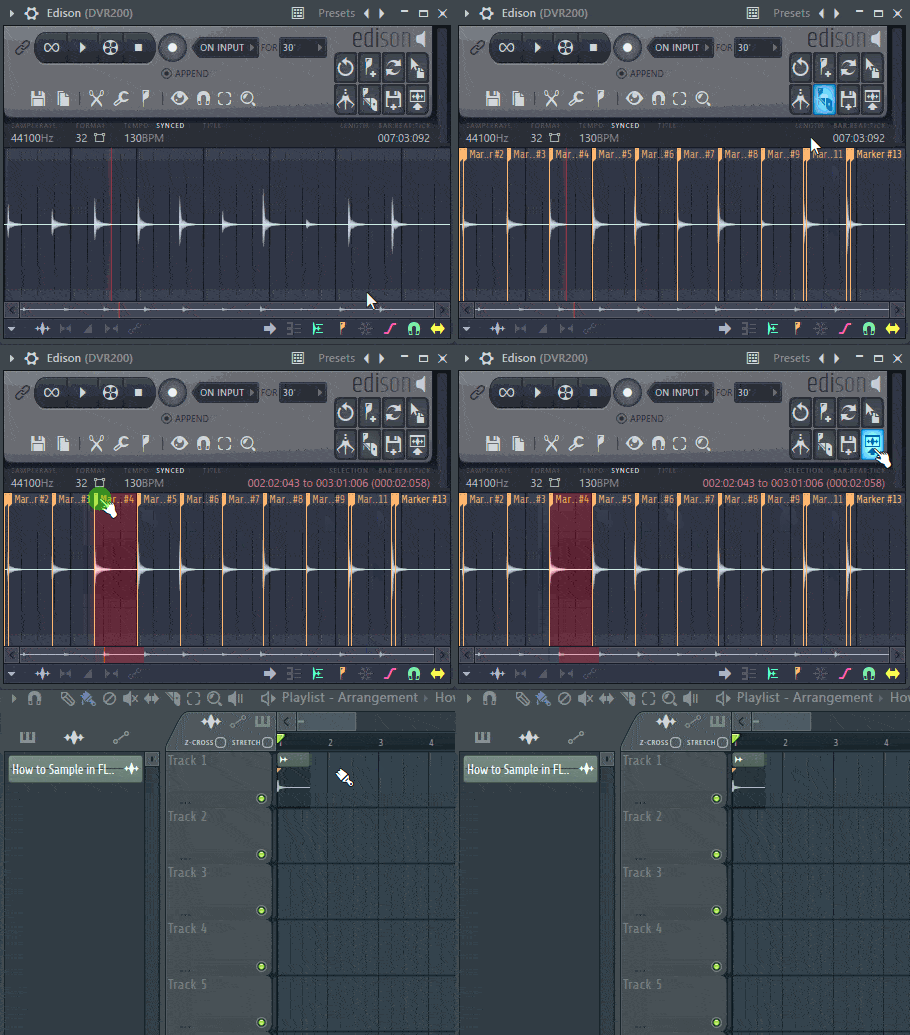
- Manually chop the sample at loud points or instrument entries.
- Align these chops with the grid.
- Use reverb or delay to fill gaps if necessary.
- Utilize FL Studio 21’s new fade feature for smoother transitions.
How to Make Classic Boom Bap Beats: A Comprehensive Guide
Step 2: Choosing and Preparing Your Loop
Select a portion of the sample that loops well:
- Find a section that naturally flows back into itself.
- Highlight the chosen section.
- Use Ctrl+Alt+C to open the chop tool.
- Select your desired settings and click “Start”.
Step 3: Using Fruity Slicer For Sampling In Fl Studio 21
Fruity Slicer is a powerful tool for chopping and manipulating samples:
- Open Fruity Slicer and drag your sample in.
- Click the razor blade icon and select “Beats” for automatic chopping.
- Adjust attack and decay to avoid popping sounds and shape your sound.

Advanced Sample Techniques in Fruity Slicer
Take your sampling to the next level with these techniques:
- Pitch shifting: Adjust the “Cents” value in 100-cent increments.
- Time stretching: Experiment with different stretch settings.
- Reversing individual slices for unique effects.
- Create patterns with varying chop lengths and arrangements.
Adding Basslines, 808s, and Melodies
Integrating new elements with your sample:
- Determine the key of your sample (use online tools if needed).
- Use FL Studio’s Pitch Corrector to identify prominent notes.
- Start by placing notes on the root note of your sample’s key.
- Experiment with different notes in the scale for basslines and melodies.
Creative Effects To Enhance The Sample
Enhance your samples with these quick techniques:
- Use the reverse button in Fruity Slicer for instant creative flips.
- Experiment with sample rate reduction for lo-fi effects.
Conclusion: How to Sample in FL Studio 21
Sampling in FL Studio 21 offers endless creative possibilities. By mastering these techniques, you’ll be able to create unique, professional-sounding tracks that stand out. Remember, practice and experimentation are key to developing your own sampling style.
Want to see these techniques in action? Check out this full video tutorial here:
What’s your favorite sampling technique in FL Studio 21?
Share in the comments below!


